Showing posts with label recipes. Show all posts

Saturday, February 2, 2019

An Abundant Kitchen Talk Notes and Resources


This Saturday's event at My Dead Aunt's Bookstore was a successful and fun event.  A big thanks to everyone who came out; it was great to see your smiling faces!  I delivered a talk covering the basics of plant-based eating and we reviewed a few of the many vegan and vegetarian cookbooks from the collection that I had the opportunity to curate for the store.  We also snacked on some samples of a few of the recipes from the cookbooks to inspire everyone to see what they could make at home.   We covered quite a few resources, and I wanted to pull them all together for everyone to reference (plus a few more) .  Even if you didn't have the opportunity to come to the event in person, you will find helpful information below.


We sampled:

Donut Holes  Here is a previous blogpost I penned about this recipe which is from Ani's Raw Food Kitchen (I substituted both dried mango and apricots in the event batch)

Chocolate Brownie Bites were this recipe from Deliciously Ella's blog (without hemp hearts, added cacao nibs) and also a version in her cookbook

Jerk Spiced Tofu - from the cookbook The Vegetarian Grill

Green Smoothie - similar to this one from Kris Karr, subbing frozen pineapple and mango for the apple


Where do you get your protein on a plant-based diet?

Movies about healthy eating

Books about healthy eating/plant-based diet

Cookbooks


Thanks for reading!


Saturday, January 26, 2019

Hot Lemon Ginger Tea


This winter is starting off cold and damp for where I live this year.  It's the kind of weather that makes you want to snuggle in with a good book or movie and a steaming mug.  This tea has the refreshing tartness of lemonade with a slight tingle from ginger.  This delicious beverage offers both comfort and the health benefits of vitamin C and antioxidants that are anti-inflammatory and immunity boosting.  If you prefer to avoid caffeine, you can use a decaffeinated green tea or choose an herbal tea like lemon, mint, or hibiscus instead.

Hot Lemon Ginger Tea


1 ginger tea bag (I used Yogi brand)
1 green tea bag (I used Celestial Seasonings brand)
1/2 lemon, washed and sliced
Sweetener, to taste (maple syrup, agave nectar, stevia, or any favorite sweetener)
1-2 slices fresh ginger root (optional)
Boiling water

In a large mug (at least 10 oz), place the sliced lemon and a small amount of sweetener (I used dried stevia from my garden which is what those dark green flecks in the cup are plus a teaspoon of maple syrup).  With a spoon, mash the lemon slices, sweetener and ginger (if using) together to release some of the juice and oil from the lemon.  Add both a green tea bag and ginger tea bag and fill the mug with boiling water.  Let steep for 5 minutes, then remove the tea bags.  Stir and adjust by adding more sweetener if desired.  Enjoy!
   

Thanks for reading!

If you liked this post, check out some other recipes found here.  


Thursday, January 25, 2018

Kitchen adventure: Carrot cake cupcakes with lemon frosting

Carrot cake cupcakes with lemon frosting

Eating more whole foods is better for us, but sometimes you just want dessert.  I have found a recipe for a cupcake that is moist and decadent without any added processed sugar, oil, or salt.  It's a cupcake that you won't feel guilty about eating with its sweetness and moistness coming from fruit and the creaminess in the frosting from the healthier oils found in nuts. 

This recipe is inspired from a current favorite cookbook and blog, Straight Up Food, by Cathy Fisher.  You'll find the original recipe here, and below is my version with all the changes I made incorporated.

For the best results, make the frosting first, then put it in the refrigerator to firm up while making the cupcakes.

Carrot Cake Cupcakes with Lemon Frosting

Lemon Frosting

9 pitted medjool dates

1 scant cup raw cashews
2 teaspoons vanilla extract
zest from 1/2 of a lemon
2 tablespoons lemon juice
¾ to 1 cup water
1/2 cup chopped roasted chopped pecans (optional; for garnish)
  1. Place the dates, cashews, lemon juice, lemon zest, and vanilla into a blender. Add ¾ cup of water.  If the water doesn't completely cover the dates and nuts, add just enough until it does. Set aside for at least  15 minutes so the dates and nuts can soften.  If you don't have a high powered blender, soak for 45 minutes or more so everything can thoroughly soften to get a smoother consistency.
  2. Blend until very smooth,  (Add a little more water if the mixture is too thick to blend, being careful not to make it too runny.)
  3. Transfer the frosting into a covered bowl, and refrigerate to cool and firm up while you are making the cupcakes.

Cupcakes

1½ cups non-dairy milk
10 pitted medjool dates
1/2 cup pineapple chunks (I used fresh, but frozen or unsweetened canned would work)
1/2 cup mango chunks (I used frozen, defrosted, and fresh would work too)
2 teaspoons vanilla extract 
1¾ cups old-fashioned rolled oats
2 teaspoons ground cinnamon
1 tablespoon baking powder
1 teaspoon baking soda
1 teaspoon ground nutmeg
⅛ teaspoon ground cloves
1½ cups grated carrots grated fine (2 medium)
1/2 cup pecans, roughly chopped
  1. Place the nondairy milk, dates, and vanilla into a bowl and set aside for at least 15 minutes (so the dates can soften).
  2. Preheat the oven to 350°F. Line a 12 cup muffin tin with paper liners
  3. Grind the oats into flour with a blender. Transfer to a medium bowl, and whisk in the cinnamon, baking powder, baking soda, nutmeg, and cloves.
  4. Place the milk, dates and vanilla mixture plus the pineapple and mango in the blender, and blend until smooth.
  5. Stir the date mixture into the bowl of dry ingredients. Fold in the grated carrots and nuts.
  6. Spoon the batter into the cupcake liners.
  7. Bake for 25-30 minutes, or until the top is medium brown and a tester comes out clean. Let cool for 10 minutes before removing from the pan and placing on a cooling rack, and cool completely before frosting. 
  8. Frost with the prepared chilled lemon frosting.  
  9. Keep refrigerated.

Thanks for reading!

If you enjoyed this post, you might also enjoy:


Friday, December 8, 2017

Easy chocolate superfood truffles

Chia seed coated truffles with cacao nibs and cacao dusted truffles with dried cherries and pecans

There are holiday treats everywhere you turn at this time of year.  So that I have something that seems decadent without straying away from my healthy eating program.   These little whole food bites are not only a decadent answer to a craving for something sweet, but they are packed with superfood nutrition and antioxidants found in raw cacao and maca powders, dried cherries, cocoa nibs and chia seeds.  I like to keep a batch stored in the freezer because I like the chewy, caramel-like texture they take on from being frozen.  These were my substitute for the Chunky candy bars that were in the office all during Halloween.

These just take a few minutes to blend together in a food processor.  They can be rolled into large marble sized balls or patted out into a pan and chilled for 30 minutes before cutting into fudge size squares.  In either case, store in a sealed container between rows of parchment paper in the freezer for a more chewy consistency or the fridge for a softer truffle-like bite.

Easy chocolate superfood truffles

1 cup tightly packed, pitted medjool dates (approximately 12 large dates)
3 Tbsp raw cacao powder (plus extra for coating balls)
2 Tbsp chia seeds 
1 Tbsp maca powder
5 Tbsp almond butter (or other nut or seed butter of choice)
1/2 cup pecans, chopped (or other nuts of your choice - optional)
1 cup rolled oats
1/2 cup maple syrup (or other liquid sweetener of choice)
1 tsp vanilla extract or powder
1/4 - 1/2 cup add-ins of your choice (cocoa nibs or mini chocolate chips, dried fruit such as cherries, cranberries, coconut shreds, or diced apricots)

Into the bowl of your food processor, put everything but the add-ins and process until smooth.  This may take awhile, but be patient and use a rubber spatula to push down the mixture from the sides often.  If the mixture seems too dry, add a few drops of warm water or plant based milk to help loosen the mixture.  Once the mixture is smooth, add any desired fruits, nuts or nibs and pulse a few times to combine without breaking them up too much, or mix them in by hand.  Take about 2 tablespoons of mixture and roll into a ball by hand, then roll in cacao powder, chopped nuts or coconut shreds. Repeat with the remaining mixture.  These can be eaten right away or stored in the refrigerator or freezer between sheets of parchment paper.

Makes about 12 - 16 treats.

Thanks for reading!


Sunday, September 10, 2017

Kitchen adventure: Waffles


I enjoy having breakfast for dinner when the weather gets cooler as it is now where I live. Sometimes, when I've had a really healthy substantial lunch, all I'll want in the evening is something to satisfy my sweet tooth, and waffles are just the thing.  These waffles are light, but substantial because of the oats and bananas; and using bananas also eliminates the need for oil in the batter.  Whether you eat them for breakfast or dinner, I think this recipe will become a favorite.

WAFFLES

Ingredients

  • 1 1/4 cup non-dairy milk + 1 tsp white or apple cider vinegar
  • 1 very ripe banana mashed
  • 2 Tbsp maple syrup 
  • 1/2 cup rolled oats pulsed in a food processor until fine or oat flour
  • 1 3/4 cups white whole wheat (or all purpose) flour
  • 1 Tbsp flaxseed meal
  • 2 tsp baking powder
  • 1 tsp vanilla extract
  • ice water as needed 
  • Toppings - vegan butter or yogurt, maple syrup, fruit (fresh or thawed berries, diced apples or peaches), nuts, cacao nibs.  

Instructions

  1. Combine non-dairy milk and vinegar in a small mixing bowl and let set for a few minutes to curdle. Then add mashed banana, maple syrup, vanilla extract. Whisk until combined and set aside.
  2. Add dry ingredients (flour, oats, flax meal, and baking powder) into a large mixing bowl and whisk until well combined.
  3. Add wet ingredients to the dry and mix until well incorporated. If the batter is too thick, add a teaspoon of ice water at a time until the desired consistency is reached.
  4. Let the batter set for 5-10 minutes while your waffle iron preheats, and add more ice water if the batter gets too thick. 
  5. When the waffle iron is ready, generously coat with non-stick spray and pour in batter until nearly to the edges. Cook according to your preferred doneness.  I like mine to be well done with crispy edges, so I cook until there isn't any steam coming from the iron.  This takes about 1.5 times through on the highest setting on my waffle iron.  Remove and place on a baking rack in a 200 degree oven to keep warm. Do not stack, but keep them in a single layer to keep crisp.
  6. Serve with desired toppings (I had blueberries and pecans), vegan butter and maple syrup.  Leftovers can be stored in the refrigerator and reheated in the toaster for crisp waffles or in the microwave for softer ones.  I double the recipe and put the extras in the in the freezer in a freezer storage bag.  They will keep for a few months.  


Friday, September 9, 2016

Summer Harvest Salad


Summer Harvest Salad


As summer draws to a close and the warm weather fruits and vegetables are at their peak of ripeness, it is easy to create a colorful, nutritious dish with just a few fresh ingredients from your garden, local farmers market or produce section of the grocery store.  This salad requires no cooking.  It is a great dish for summer picnics or potlucks or when it's too hot to cook.  This dish comes together in very little time because the season's best ingredients need very little to bring out their full flavor.   With the addition of some grilled tofu, fish or chicken and some crusty bread, you have a light meal ready in no time.

Summer harvest salad

2-3 large ripe tomatoes, sliced
2 ears of fresh corn, shuck and remove kernels from cob
1/4 ro 1/2 small red onion, finely chopped
1/2 lemon
micro-greens or sprouts
fresh chopped herbs of choice (basil, thyme, mint)
sea salt and pepper
olive oil (optional)

Arrange the tomato slices on a serving platter.  Sprinkle the corn kernels over the tomato slices.  Sprinkle the onions over the corn.  Sprinkle the chopped herbs over the onions.  Season with sea salt and pepper to taste.  Top with some micro-greens or sprouts.  Squeeze the lemon over the salad and drizzle with olive oil (if using).  Serve at room temperature or slightly chilled.

Thanks for reading!
Harvest from my garden

Monday, May 30, 2016

Kitchen adventure: Superfood granola


Granola with fresh picked strawberries, blueberries and cashew milk

Store bought granola can be loaded with more sugar and fat than you'd like to start your day.  This granola is packed with superfoods and sweetened with dates and dried fruits.  The traditional oil is replaced with banana and tahini (or nut butter of your choice).   This easy to make recipe works well for breakfast, snacks or dessert.  This recipe was inspired by this original recipe at Jenny Mustard's blog.  Although the ingredient list is long, it comes together quickly. Feel free to substitute any of your favorite nuts, seeds or dried fruits that you like.

Superfood granola

12 large medjool dates, soaked and drained (save water)
1 large ripe banana
½ cup tahini (or use almond, cashew or peanut butter)

1 teaspoon vanilla extract
1 scoop (1 tablespoon, superfood green powder) optional
4 cups old fashioned oats
1/4 cup raw cacao powder
1/4 cup flax seeds
1 cup raw nuts roughly chopped, (I used walnuts and almonds for this batch)

8-10 prunes or dried mission figs, chopped (this batch had figs)
½ cup raisins or other dried fruit like cherries, blueberries or cranberries
1/3 cup goji berries (or more raisins)
½ cup raw sunflower seeds

½ cup raw pumpkin seeds
½ cup shredded unsweetened coconut
1 teaspoon cinnamon
a pinch of cardamom 


- Preheat the oven to 325 degrees.
- In a food processor or blender combine drained dates, tahini, bananas, superfood powder and vanilla extract until smooth.  If the mixture is too thick to process, add just enough date soaking water to make a thick smooth paste.
- 
In a large mixing bowl, add all the dry ingredients and stir to combine.
- Add the date mixture to the bowl and mix until all the dry ingredients are coated.  
- Spread the granola evenly on a parchment paper or silicone mat lined large baking sheet and press flat with your hand or back of a spoon
- Bake the granola for 25-30 minutes, until golden brown
- Remove from the oven, let cool thoroughly and break into bite sized chunks

- Store in an airtight container.

Thanks for reading!

If you liked this post, you may like:
Healthy cold cereal
Carrot cake granola
Overnight oat and chia seed pudding

Tuesday, December 22, 2015

Mushroom Veggie Burger Recipe

Mushroom and eggplant burger on a whole wheat bun with garden fresh spinach, tomato and refrigerator pickles

I love a good veggie burger and enjoy giving new recipes a try.  The recipe in this video was the inspiration for a burger that has become my current favorite.  During the summer months, I even substituted eggplant for some of the mushrooms when the garden offered up an over-abundance.  (The mushroom/and eggplant version is pictured here.)

Here is my take on the original recipe:


Mushroom Veggie Burgers

(makes 6-8)

1 pound mushrooms (white button or portobellos)
1 large onion, finely chopped
1/2 bell pepper, finely chopped
1/2 cup black olives, finely chopped
2 tablespoons Braggs amino acids or soy sauce
2 tablespoons barbeque sauce 
1 cup cooked brown rice
2 teaspoons garlic powder or 3-4 cloves garlic pressed or finely minced
1 teaspoon smoked paprika
1/8 teaspoon cayenne pepper  (optional)
2 teaspoons ground cumin

1/2 to 1 cup rolled oats, oat flour or bread crumbs
2 tablespoons olive oil for cooking burgers

1.  Process the mushrooms in a food processor until mushy.
2.  Cook over medium heat in a skillet, stirring often until most of the water is cooked out.  Put in a large bowl.
3.  Using the same skillet, stir fry the onions and peppers until wilted.  Add to the bowl with the mushrooms.
4.  Add garlic, smoked paprika, cayenne pepper, cumin, Braggs, barbeque sauce, olives and brown rice and 1/2 cup of the oats or breadcrumbs to the bowl.  

5.  Mix well.  
6.  If the mixture seems too moist, add more oats or breadcrumbs until the mixture holds together.
7. Shape into 6-8 burgers.  
8.  In a skillet heated over medium heat with olive oil, cook until browned on both sides, turning only once to keep from breaking apart
8.  Serve on buns with your favorite burger toppings.  

Thanks for reading!

If you enjoyed this post, you may also like:
Eggplant veggie burgers
Whole wheat sandwich rolls


Monday, October 5, 2015

Discovering aquafaba - Vegan Lemon Pound Cake


Pound cake is a favorite dessert from my childhood, and every family seems to have a prized recipe.  My Aunt Carolyn makes one of the best as does my friend Lisa.  Now, how to make this delicious treat vegan friendly...

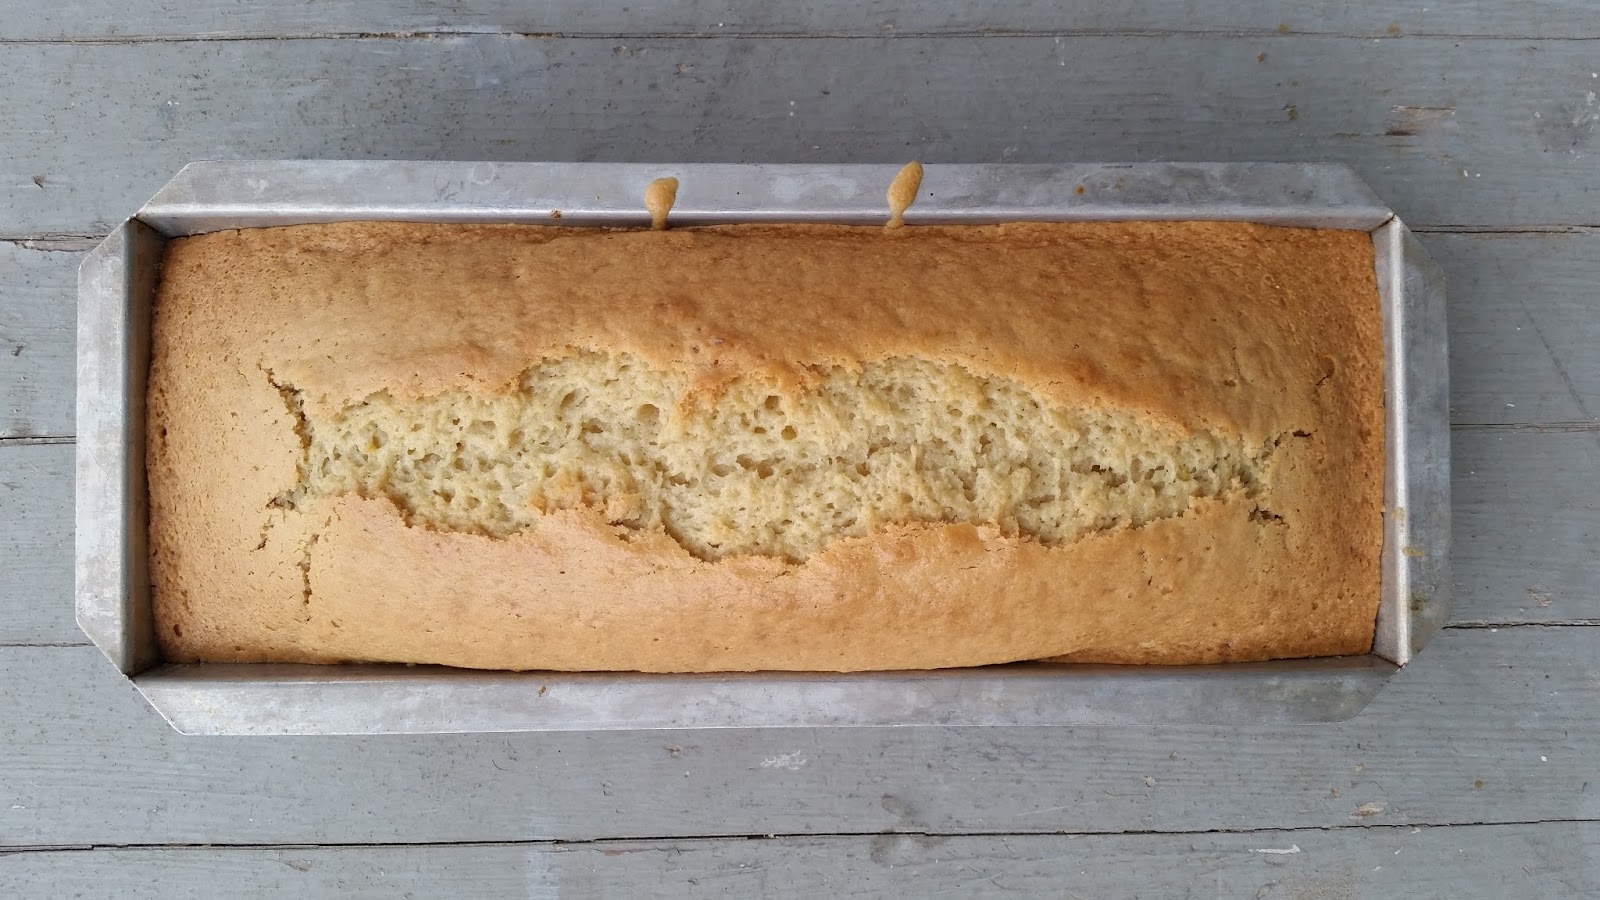
I was inspired by Popsugar's recipe for a vegan version of Starbuck's lemon pound cake and research into aquafaba (canned chickpea water) as an egg substitute.  Vegan baking can have mixed results as the chemistry isn't always quite right when you substitute for an ingredient like eggs, let alone all the dairy products in a recipe.  The finished recipe can sometimes be quite dense and sometimes more soggy than the original version; usually still edible, but not always as satisfying as imagined. That being said, I've had mostly good success with my vegan baking adventures because I do so much research to learn from others' mistakes beforehand.  I am happy that the aquafaba worked well and that I again have a great pound cake recipe for special occasions.

Vegan Lemon Pound Cake

makes 12 slices


Lemon cake:
1 1/2 cups unsweetened non-dairy milk
2 teaspoon apple cider vinegar
1 1/2 cups white whole wheat flour
2/3 cup almond meal (ground raw almonds)
1 tablespoon baking powder
1 teaspoon baking soda
1/2 teaspoon salt (optional)
1 1/2 cup sugar
2/3 cup oil (coconut, olive, canola)
2/3 cup aquafaba (water drained from canned chickpeas)
Juice from half a small lemon (about 1 tablespoon)
grated lemon rind from half a small lemon
2 teaspoons almond extract

Lemon Icing:
1 cup powdered sugar
Juice from half a small lemon (about 1 tablespoon)
grated lemon rind from half a small lemon
1 -3 teaspoons non-dairy milk

  1. Preheat oven to 350ºF. 
  2. Lightly oil or spray a large loaf pan.
  3. In the medium bowl add the milk, aquafaba, vinegar, oil, lemon juice, and vanilla extract, grated lemon rind and mix well.
  4. Make a well in your dry ingredients, pour in the wet and stir until just combined and fairly smooth. 
  5. Pour batter into the prepared loaf pan, and bake for 45-60 minutes or until a toothpick inserted comes out clean.
  6. Let sit for about 10 minutes before removing from the pan to cool thoroughly on a wire rack.
  7. Whisk together the powdered sugar, lemon juice and rinding for the icing and drizzle in just enough milk until you have a smooth icing that is not too thin.  
  8. Drizzle icing on top of the completely cool cake.

I'll definitely be ready with this cake next spring when the strawberries are ripe in the garden to make a strawberry shortcake.

Thanks for reading!


Sunday, June 21, 2015

Kitchen adventures: Vegan parmesan sprinkles

Vegan parmesan sprinkles on popcorn


I'm always looking for creative ways to pack more nutrition into any recipe but still have it taste great.  I'm always grating veggies into my recipes to replace some of the fat; like finely shredded zucchini or carrots into muffins, pancakes and waffles.  I also add a handful or two of spinach or kale to any smoothie without it changing the flavor but providing a vitamin and fiber boost.

Another thing I like to add to boost nutrition is spirulina.  It has been around in health food stores for quite a while, but is becoming more widely known as "superfoods" are gaining popularity.  It is a blue-green algae that is packed with nutrients.  Below is an infographic explaining the benefits of spirulina, and you can also learn more here.


Add some to your favorite homemade salad dressing or smoothie like in this smoothie bowl.


This bowl contains a spinach, raspberry, frozen banana and coconut water smoothie enriched with spirulina that is topped with granola, coconut, raspberries and drizzled with fig syrup.  Fantastic for breakfast or a snack.

Here's another tasty way to give spirulina a try as pictured at the top of the post:

Vegan parmesan sprinkles

makes approximately 1/3 cup

2 tablespoons nutritional yeast
2 tablespoons ground hemp seeds
1 teaspoon spirulina powder
1 teaspoon garlic powder
1/2 teaspoon smoked paprika
1/2 teaspoon sea salt (optional)

Put all ingredients in a small bowl and mix well.
To serve, sprinkle over pasta, popcorn, soup or salad.
Store in a covered container in the refrigerator.

I hope you give it a try.

Thanks for reading!


Wednesday, June 3, 2015

Kitchen adventures: easy breakfast bowls

Freshly picked strawberries and greens become a breakfast smoothie bowl

Breakfast doesn't have to be complicated or time consuming to put together.  Using what you have on hand can make a hearty healthy breakfast in no time.  I love mixing lots of different textures in my bowl for a satisfying start to the day.

Here are two different bowls of goodness that don't really need a recipe and can be put together quickly with ingredients you have on hand:

Smoothie bowl

A favorite is a smoothie bowl like the one pictured above.  The base is a thick fruit and vegetable smoothie (whatever is your favorite blend)..  This one the smoothie is made from greens, strawberries, protein powder, almond milk, frozen bananas and maca powder. The toppings are fresh strawberries, chia seeds, homemade granola, cocao nibs, hemp seeds and a drizzle of agave nectar.


Hearty oatmeal

A more traditional breakfast is oatmeal.  This one is dressed up with some of my favorite toppings.

Oatmeal bowl

  • oatmeal (either cooked oats or raw soaked in almond or other milk overnight)
  • top with your favorite fruits, nuts, seeds, sweetener and milk

The bowl pictured above is oatmeal cooked with cinnamon, flax seeds and vanilla extract.  The toppings are blueberries, pecans, chia seeds, unsweetened coconut and a drizzle of maple syrup

Here are a couple of other quick breakfasts from previous posts:

Green Smoothie
Overnight oat and chia seed pudding
Sweet potato mousse

Having a good breakfast doesn't have to take too much time to put together to keep you fueled to tackle your morning.

Thanks for reading!


Sunday, May 17, 2015

Potato vegetable fritters

Potato vegetable fritters

Spring gardening season is in full swing.  After a full day at the day job and trying to squeeze in some gardening before dark, dinner prep time gets squeezed.  Not wanting to fall back on takeout or prepared foods, we have been eating simple, but very tasty meals.  We adapted this original recipe for zucchini potato fritters to what we had on hand and increased the recipe to nearly triple so they could be our entree with a salad and to have leftovers for lunch the next day.  These little fritters were quick to prepare and tasty so will surely make repeat appearances on our menu.


Potato vegetable fritters

makes approximately 15
  • Add salt and pepper to taste.  
  • Roll about ⅓ cup of the mixture into a ball and then flatten to make a small patty.
  • If you have time, allow the patties to rest in the refrigerator to firm up for about an hour or freezer for 20-30 minutes.  (We didn’t have time and our potatoes were room temperature, so we cooked them right away, but if you are using freshly cooked hot potatoes, some cooling will be necessary to prevent the fritter from falling apart.)  
  • Heat a skillet on medium-high heat and coat the bottom with 1-2 tablespoons of olive oil.  
  • Cook the patties without crowding until golden brown on each side.
  • Drain on a paper towel and serve with your favorite sauce like ketchup, bbq, marinara or sweet and sour,


3 medium sized potatoes, cooked and grated or roughly mashed (removing the peel is optional)
2-3 zucchini or yellow squash, grated
2 carrots, grated
½ onion, chopped or grated
1-2 cloves, garlic, minced or grated
½ cup peas (frozen or fresh)
½-¾ cup whole wheat flour (more or less depending on the moisture in the vegetables)
1 tsp baking powder
½ tsp dried thyme, ground sage, ground rosemary or your favorite herbs (optional)
sea salt and pepper to taste
oil for cooking (we used olive oil)


( I used a food processor fitted with a small shred disk to grate the cooked potatoes squash, carrots, onion and garlic , one after another into the food processor bowl.)


Put the grated vegetables into a large mixing bowl.  
Add in the peas, ½ cup flour, baking powder, herbs and mix well.  
Add more flour if needed to make a very stiff batter (if it is too soft, these will fall apart when cooking).  


These are also a great leftover grab and go snack right out of the refrigerator.


I hope you are inspired to still make simple homemade food even when time is short.  Your health and your tastebuds will benefit.


Thanks for reading!

Salad greens picked fresh from the spring garden

Sunday, February 8, 2015

Kitchen adventure: sweet potato cake


This month has been cold and dreary so baking is one of those comforting activities that I enjoy to keep warm inside.  I've been experimenting with more vegan baking, and have had some good successes along with a few less than stellar results.  My husband's birthday is in February and he likes carrot cake.   I decided to bake a sweet potato cake to honor the day.  It's a similar twist to his favorite with lots of fragrant, warm spices and a soft, but dense texture.  There's plenty of nutrition packed in this sweet treat with lots whole grains (wheat and flax), nuts and apples as well as the sweet potatoes.

I was inspired by this recipe from Sweet Potato Soul.  I met Jenné in NYC when she taught a segment at the Main Street Vegan Academy which included her teaching us and making tacos for lunch - amazing!  Check out her many recipes and videos for more inspiration in vegan cooking.


Sweet potato cake with coconut cashew cream icing

INGREDIENTS:
CAKE
2 1/4 cup white whole wheat flour
1 tsp baking powder
1 1/2 tsp baking soda
2 tsp cinnamon
1 tsp nutmeg
1 tsp ground ginger
1/2 tsp cardamom
1/2 tsp salt
6 tbsp flax seed meal
3/4 cup warm water
1 1/4 cup sugar 
1 apple, grated (or used 1/2 cup crushed pineapple)
1 cup canola oil
2 tablespoons apple cider vinegar
2 tsp vanilla
2 cup shredded sweet potato
1 cup nuts, chopped
1/2 cup shredded, unsweetened coconut

ICING
14-oz can of full fat coconut milk - put in refrigerator upside down
1 cup raw cashews, soaked in water and drained
2 tsp vanilla extract or 2 in piece of vanilla bean
1/4 cup maple syrup
1 tbsp lemon or orange juice (juice of 1/2 of lemon)

INSTRUCTIONS:
ICING

  • Open the can of coconut milk right side up and scoop out the thick cream layer, leaving the liquid in the can. Place the coconut cream into a high speed blender.
  • Add in the soaked cashews, vanilla, lemon juice and 2 tablespoons of maple syrup.
  • Blend until smooth using some of the coconut milk to thin as necessary
  • Put the icing in the refrigerator to firm up until the cake is ready. 


CAKE

  • Preheat oven to 350º.
  • Oil a tube pan 
  • In a small bowl, sift together dry ingredients (flour through salt) and set aside.
  • In a large bowl, whisk together flax seed meal and water and let sit a few minutes until thick. 
  • Add the sugar, oil, vinegar and vanilla and beat well.
  • Add the grated sweet potato and apple and  and mix until combined.
  • Add dry mix and stir until moistened, but do not over mix.  This is a very thick batter, but if the mixture is too dry, add a few spoonfuls of almond milk or orange juice.
  • Fold in nuts and coconut.
  • Pour into prepared pan.
  • Bake for 45-60 minutes or until a toothpick comes out clean.
  • Let cool in pan 10 minutes.
  • Use a knife to loosen edges of cake from pans.
  • Let cool fully on a wire rack.
  • Once the cake has cooled completely, frost and serve.
  • Store cake in the fridge to keep the icing nice and firm.

I hope you'll make this cake for a special occasion.  It's worth the effort.


Thanks for reading!

Cooling racks on baking day

Sunday, October 5, 2014

Kitchen adventures: vegan chickpea omelet

Chickpea omelet topped with sauteed zucchini, sweet peppers, mushrooms, onions, garlic and tomatoes

It was one of those days that I had an armful of great veggies from the garden, and I wanted something light to take advantage of my harvest.  I decided to give a chickpea omelet a try.  The chickpea base was a perfect way to showcase some of the best of the garden harvest while providing plenty of protein.  It would also taste great topped with your favorite pasta sauce or any leftover veggies you have on hand.

Chickpea omelet

2 cups chickpea flour
2 tablespoons flaxmeal
3 tablespoons nutritional yeast
1/2 teaspoon smoked paprika
1/2 teaspoon turmeric powder
1 1/2  cup non-dairy milk + 1/2 cup water
2 garlic cloves, finely minced
1 small onion, finely chopped
1 tablespoon chopped fresh herbs of your choice (I used thyme and parsley)
salt and pepper to taste
2 tablespoons olive oil

In a mixing bowl, stir together all the ingredients except the olive oil.  Add more water if necessary to make a consistency like pancake batter.

Heat a heavy skillet on medium heat.  Add oil and saute onions and garlic until fragrant and the onions are translucent.  Pour in the chickpea batter and cook until the top is set.  Optionally, If you would like to brown the top, run it under the broiler for a few minutes or flip the omelet onto a plate and slide it back into the pan to brown.   To serve, top with your favorite vegetables lightly sauteed in a little olive oil and garlic or a favorite pasta sauce .

Thanks for reading!

If you enjoyed this post, please share it with your family and friends using the links below.

Sunny zinnias in the garden

Sunday, September 14, 2014

Kitchen adventures: salad spring rolls with peanut dipping sauce (vegan and raw)

  
Salad spring rolls with peanut dipping sauce

The memory of summer is fading fast here, but there are still warm afternoons where you might want something light for lunch or dinner.  These fresh spring rolls come together quickly and can be made with whatever vegetables you like and have on hand.


Spring salad rolls with peanut dipping sauce

Dipping sauce
¼ cup peanut butter or other nut butter
3/4 cup very hot water
1 tablespoon Braggs amino acids or soy sauce
2 teaspoons agave nectar
2 tablespoons lemon juice (about 1 lemon)
2 tablespoons olive oil
chili pepper, ,pepper sauce or chopped fresh hot peppers to taste

1. Stir together the peanut butter and hot water in a small bowl until smooth.
2. Add the rest of the ingredients and whisk until thoroughly combined. Set aside at room temperature while making the rolls.

Salad rolls
makes approximately 12

12 cucumber spears
1 cup grated carrot
1 cup packed mung bean sprouts
1 ripe avocado, sliced lengthwise into 12 even pieces
12 lettuce leaves or 2 cups shredded Napa cabbage
1/2 cup grated radish
¼ c. fresh mint, Thai basil or cilantro, coarsely chopped
tofu strips, plain or marinated in Braggs amino acids or soy sauce, garlic powder and olive oil
12 rice spring roll wrappers

1. Place each ingredient in a separate bowl or plate.
2. Fill a wide, shallow bowl with warm water. Place one spring roll wrapper in the bowl and let it soak until limp, about 5 seconds. Lay the wrapper down flat on your work surface. In the upper center section of the wrapper, place 1 piece of lettuce or small bed of about 2 tablespoons shredded cabbage. You will want to leave at least 1 in. at the bottom of the wrapper uncovered; no need to leave any space at the top. In a compact vertical line, arrange a cucumber spear, avocado slice and tofu strip, small amount (approximately 1 generous tablespoon) of the carrot, bean sprouts  and radish plus a sprinkle (approximately 1 teaspoon) of the mint, basil or cilantro.
3. Fold the bottom edge of the wrapper on top of the filling. Then tightly (but gently) pull the left edge of the wrapper over the filling and the folded bottom edge and then fold the right edge of the wrapper over. It may be helpful to put pressure on the filling with your fingertips to make it as compact as possible while rolling.  Keeping the filling as compact as possible, roll the filling in the wrapper. Press the edges of the wrapper together to close. Repeat until all 12 spring rolls are assembled.
4. Serve with peanut sauce

Any leftover sauce makes a great salad dressing.  

Thanks for reading!

If you liked this post, please share it using the links below.